

Key Takeaways
- Shade is not uniform: partial, dappled, and deep shade each support different plants.
- Soil improvement is the most important preparation step for shaded areas.
- Many shade-tolerant plants, including hostas and ferns, are low-maintenance once established.
- Watering needs in shade differ from sun gardens because evaporation is slower.
- Tree roots compete with ground-level plants for moisture and nutrients in dense shade.
What you will need
Understanding shade: what the labels mean
Shade is not a single condition. The difference between 2 hours of sun and 5 hours of sun can determine whether a plant thrives, struggles, or dies. Most plant tags and gardening resources use three categories:
- Partial shade: 3 to 6 hours of direct sun, often in morning or late afternoon
- Full shade: fewer than 3 hours of direct sun per day
- Dappled shade: indirect, broken light all day under a tree canopy
A common misconception is that shade means darkness. In practice, even a spot that receives no direct sun usually gets reflected light from nearby surfaces, which many plants use quite efficiently. For a broader look at how light behaves differently indoors versus out, the article on natural and artificial light covers those principles in an interior context.
Trowel and hand fork
Used to dig individual planting holes and loosen compacted soil in the bed.
Soil pH test kit
Checks whether your soil pH falls in the range most shade plants prefer (typically 5.5 to 6.5).
Compost or aged organic matter
Improves drainage and nutrient content in dense, root-filled shade soil.
Mulch (bark chips or shredded leaves)
Retains moisture, moderates soil temperature, and suppresses weeds around new plants.
Watering can or soaker hose
Delivers water directly to the root zone without wetting foliage in still, humid shade conditions.
Step-by-step: setting up and planting a shade bed
Follow these steps in order. Skipping the soil assessment (step 2 in particular) is one of the most common reasons shade gardens underperform. Once established, most shade plantings require little intervention beyond mulching and occasional division.
Assess how much shade you actually have
Observe the area at three points during the day: morning, midday, and late afternoon. Count the hours of direct sun it receives. A spot with 3 to 6 hours of sun is partial shade; 1 to 3 hours is full shade; light that filters through a moving tree canopy all day is dappled shade. Plant labels use these terms, so matching them to your conditions is the single most useful thing you can do before buying anything.
Test and amend the soil
Shaded spots under trees are often compacted and full of surface roots that compete aggressively for moisture and nutrients. Dig a small test hole about 8 inches deep. If roots are dense throughout, build the bed up with added soil and compost rather than digging further and damaging the tree. For compacted clay without significant root competition, work 3 to 4 inches of compost into the top 8 inches of soil. Aim for a loose, moisture-retentive mix that still drains after rain.
Choose plants matched to your specific shade type
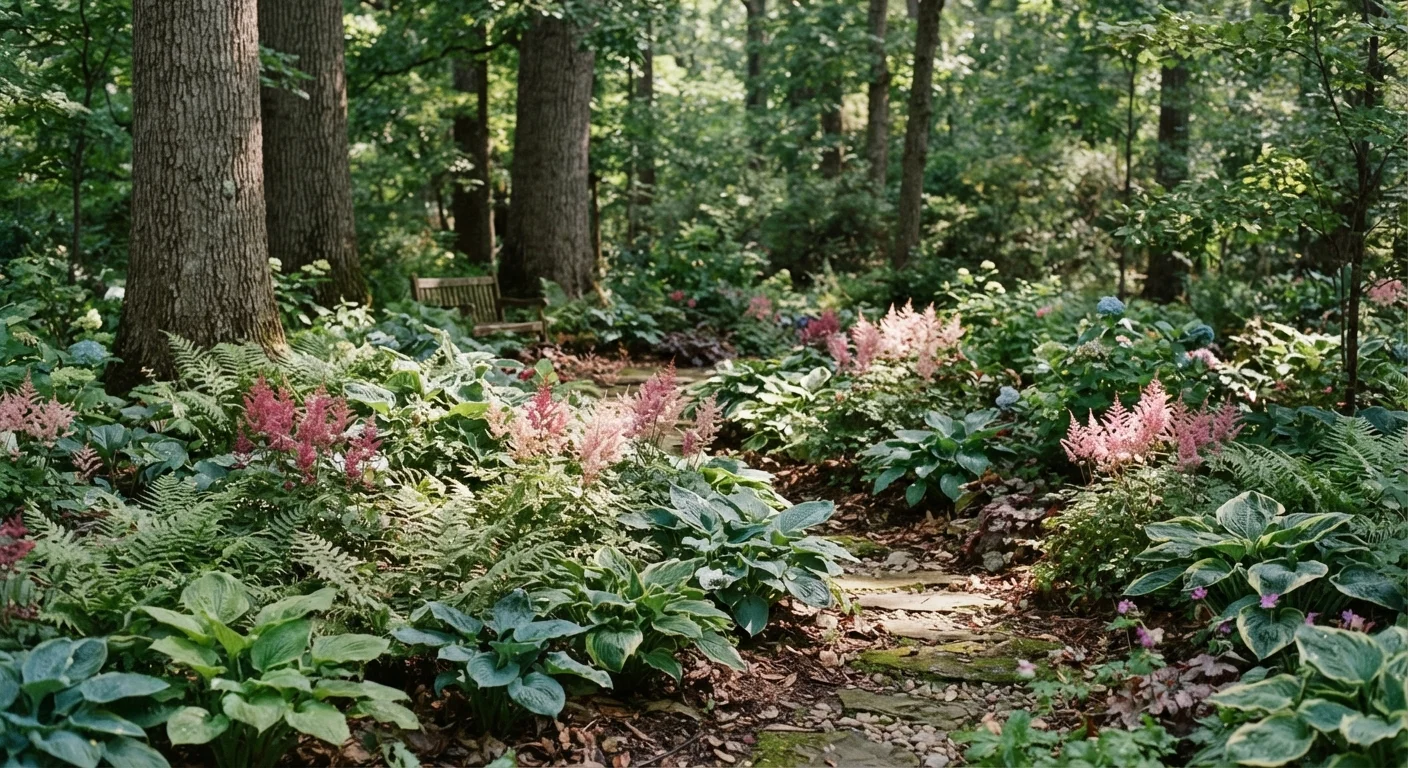
For partial shade, you have the widest selection: astilbe, bleeding heart (Dicentra), coral bells (Heuchera), and many hydrangea varieties all perform well. For full shade, hostas and ferns are reliable workhorses. Dappled shade suits woodland plants like trillium, Solomon's seal, and native wild ginger. If you want to incorporate plants native to your region, the guide to native plants in the home garden covers the trade-offs in detail.
Plant at the right depth and spacing
Dig each hole to match the root ball depth: the crown of the plant (where roots meet stems) should sit at or just above the surrounding soil surface. Space plants according to their mature spread, not their current size. Overcrowding in shade leads to poor air circulation and increased risk of fungal issues. Water each plant in thoroughly after planting to settle soil around the roots.
Mulch the bed
Apply 2 to 3 inches of organic mulch such as shredded bark or leaves across the entire bed, keeping it a few inches away from plant stems and tree trunks. Mulch holds moisture that shade plants depend on, moderates soil temperature, and breaks down gradually to feed the soil. Refresh the layer annually in spring before growth resumes.
Establish a watering routine suited to shade
Shade reduces evaporation, so shaded beds often stay moist longer than sunny ones. Check soil moisture 2 inches down before watering rather than following a fixed schedule. Newly planted specimens need consistent moisture for their first growing season. Established shade plants generally need less supplemental water than sun plants, but they are not drought-proof, especially those competing with tree roots. The watering schedules guide explains how to calibrate frequency to soil type and plant needs.
Once your plants are in the ground, keep an eye on foliage color through the first season. Yellowing leaves in shade often signal nutrient deficiency or too much competition from tree roots rather than too much light. Top-dressing with compost in early spring each year addresses both issues over time.
Ongoing care and common problems
Shade gardens tend to be lower-maintenance than sun borders once plants are established, but a few issues come up regularly.
Slugs and snails
Moist, sheltered conditions attract slugs, which feed on hosta and other large-leaved plants overnight. Hand-picking after dark is effective on a small scale. Coarse materials like crushed shells around plant bases can deter movement, though results vary. Keeping mulch pulled slightly back from plant crowns removes a common hiding spot.
Overcrowding as plants mature
Hostas and ferns spread over time. Divide clumps every 3 to 4 years in early spring before growth fully emerges. This keeps plants vigorous and gives you additional stock to fill in bare spots. If neighboring shrubs or trees are casting more shade than intended, selective thinning of lower branches can increase light. The guide to pruning shrubs and trees safely explains when and how to do this without harming the plant.
Bare patches near tree trunks
Dense feeder roots near a tree base make it genuinely difficult to establish ground covers. In those spots, consider a decorative mulched area instead of fighting the conditions. Stone, gravel, or a ring of potted shade plants placed on the surface can look intentional and avoids stressing the tree.